Mapping
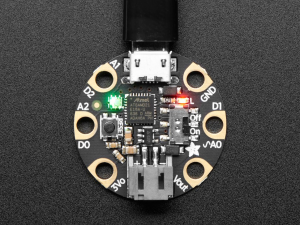
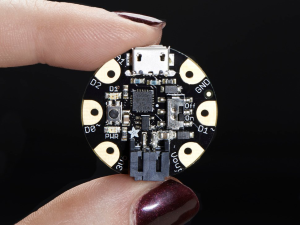
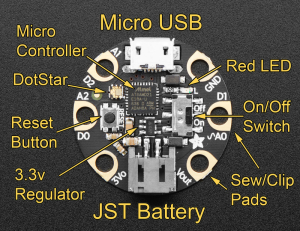
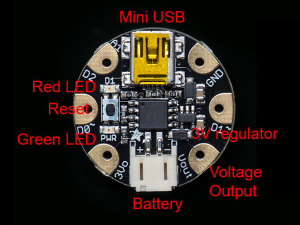
2 types de microcontrolleurs utilisés pour cet atelier: GEMMA M0 et GEMMA V2
Pour le Gemma M0[modifier | modifier le wikicode]
L'ensemble des infos est disponible en anglais sur https://learn.adafruit.com/adafruit-gemma-m0/overview
Logiciels à installer:
Pour Windows, télécharger et installer les drivers: https://github.com/adafruit/Adafruit_Windows_Drivers/releases/latest
Pour toutes les plateformes:
- installer Circuit Python en suivant la procédure: https://learn.adafruit.com/adafruit-gemma-m0/circuitpython
- installer MU Editor: https://codewith.mu/
Vous pouvez connecter votre microcontroleur et lancer MU Editor pour tester votre premier code:
import board
import digitalio
import time

led = digitalio.DigitalInOut(board.LED)
led.direction = digitalio.Direction.OUTPUT

while True:
    led.value = True
    time.sleep(0.5)
    led.value = False
    time.sleep(0.5)
installer la bibliothèque pour lesa NeoPixel: https://github.com/adafruit/Adafruit_CircuitPython_NeoPixel4
Pour tester votre capteur, copier ce code
"""CircuitPython Essentials Analog In example"""
import time
import board
from analogio import AnalogIn

analog_in = AnalogIn(board.A1)


def get_voltage(pin):
    return (pin.value * 3.3) / 65536


while True:
    print((get_voltage(analog_in),))
    time.sleep(0.1)
et branchez votre capteur d'un coté sur A1 et de l'autre sur GND
Pour tester le neopixel: https://learn.adafruit.com/circuitpython-essentials/circuitpython-neopixel
"""CircuitPython Essentials NeoPixel RGBW example"""
import time
import board
import neopixel

pixel_pin = board.A1
num_pixels = 1

pixels = neopixel.NeoPixel(pixel_pin, num_pixels, brightness=0.3, auto_write=False)


def colorwheel(pos):
    # Input a value 0 to 255 to get a color value.
    # The colours are a transition r - g - b - back to r.
    if pos < 0 or pos > 255:
        return (0, 0, 0, 0)
    if pos < 85:
        return (255 - pos * 3, pos * 3, 0, 0)
    if pos < 170:
        pos -= 85
        return (0, 255 - pos * 3, pos * 3, 0)
    pos -= 170
    return (pos * 3, 0, 255 - pos * 3, 0)


def color_chase(color, wait):
    for i in range(num_pixels):
        pixels[i] = color
        time.sleep(wait)
        pixels.show()
    time.sleep(0.5)


def rainbow_cycle(wait):
    for j in range(255):
        for i in range(num_pixels):
            rc_index = (i * 256 // num_pixels) + j
            pixels[i] = colorwheel(rc_index & 255)
        pixels.show()
        time.sleep(wait)


RED = (255, 0, 0, 0)
YELLOW = (255, 150, 0, 0)
GREEN = (0, 255, 0, 0)
CYAN = (0, 255, 255, 0)
BLUE = (0, 0, 255, 0)
PURPLE = (180, 0, 255, 0)

while True:
    pixels.fill(RED)
    pixels.show()
    # Increase or decrease to change the speed of the solid color change.
    time.sleep(1)
    pixels.fill(GREEN)
    pixels.show()
    time.sleep(1)
    pixels.fill(BLUE)
    pixels.show()
    time.sleep(1)

    color_chase(RED, 0.1)  # Increase the number to slow down the color chase
    color_chase(YELLOW, 0.1)
    color_chase(GREEN, 0.1)
    color_chase(CYAN, 0.1)
    color_chase(BLUE, 0.1)
    color_chase(PURPLE, 0.1)

    rainbow_cycle(0)  # Increase the number to slow down the rainbow
Pour le Gemma v2[modifier | modifier le wikicode]
L'ensemble des infos est disponible en anglais sur https://learn.adafruit.com/introducing-gemma/introduction
Logiciels à installer:
Pour Windows, télécharger et installer les drivers: https://github.com/adafruit/Adafruit_Windows_Drivers/releases/download/2.5.0.0/adafruit_drivers_2.5.0.0.exe
Pour toutes les plateformes:
Installer l'IDE Arduino: https://www.arduino.cc/en/software
Ajouter le plugin pour GEMMA : https://learn.adafruit.com/add-boards-arduino-v164
Installer la bibliothèque (library) Adafruit NeoPixel
Suivre les instructions https://learn.adafruit.com/introducing-gemma/setting-up-with-arduino-ide
vous pouvez poursuivre avec la programmation dans l'IDE Arduino: https://learn.adafruit.com/introducing-gemma/programming-with-arduino-ide


